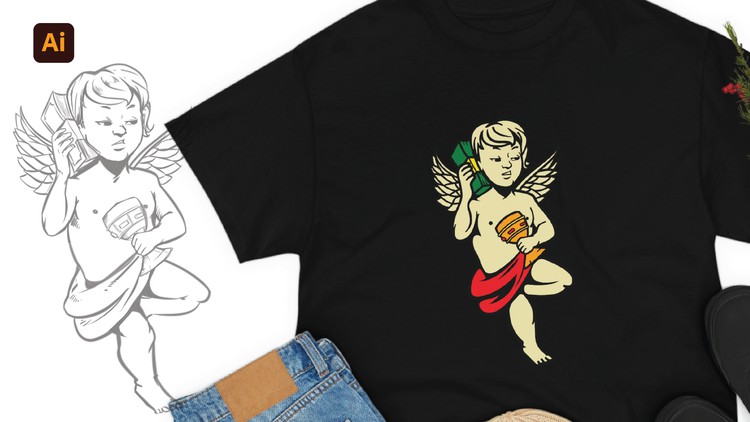
Learn to turn any sketch you drawn on paper or digitally into a vector character suitable for tshirt/sticker design
What you will learn
Learn how to turn your paper sketch to a vector character that can be used for tshirt and sticker design
Learn how to create an illustrator doc for character design and how to set up setup illustrator windows to make the process much easier
Learn about all the tools needed for character design on illustrator
Learn how to use the pen tool for outling, shading and colouring a character
Description
Hello, I’m Daniel Ogu. I’m a graphics designer and Illustrator, I’ve worked on several original characters for frients and clients all over the world for T-shirt and stciker design, most of which come from simple sketches of talented artists.
So I thought to mesyself: “I should create a course on this”.
In this course I’ll be breaking down my process, showing you how I work on simple skectches drawn on paper and on digital softwares and turn them to orifina vector artworks suitable for use as stickers and on tees for example amongst so many other uses.
Welcome to “Creating vector characters from your sketch with Illustrator”! In this course, you will learn how to create beautiful, detailed vector garphics using one of the most popular design software programs, Adobe Illustrator. Whether you are a beginner or an intermediate user, this course has something for you.
In the second section, “Setting Things Up,” I will show you how to set up your Illustrator workspace and prepare your files for the charcter creation process. This includes setting up layers, creating a new document, and importing reference images.
In the third section, “Getting Familiar with Tools,” we will dive deeper into the various tools in Illustrator and show you how to use them to create a vector character. We will cover the Pen tool in detail, including how to create smooth, curved lines and how to add details to your design. We will also demonstrate how to use the Paint brush tool to create clean, precise lines and smooth, organic shapes.
In the fourth section, “Outlining,” I will guide you through the process of outlining your subject using the Pen tool. You will learn how to map out the main features of your portrait, such as the eyes, nose, mouth, and ears, and how to create smooth, curved lines that follow the contours of your reference image. We will also deconstruct the subject into shapes and lines to understand the process of outlining with the pen tool better.
In the fifth section, “Colouring and Shading” I will teach you how to add colouring and shading to your character using the pen tool tool and other techniques.
In the final section, “Exporting and Conclusion” I will show you how to export your finished character design and the best formats to export your character as for several purposes and uses.
Then I conclude and ask you to leave a review Lol.
Content
